|
|
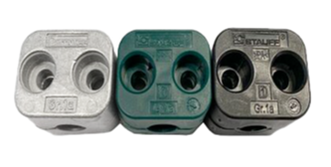
A stauff clamp is a clamp used to hold pipes, hoses, and tubes firmly while working. The clamp body is made of polypropylene, aluminum, polyamide, and polypropylene with a rubber insert (RI). The main purpose of a stauff clamp is to hold objects firmly and ensure stability, especially in hydraulic systems. The stauff clamps are produced in three types – standard series, twin, and heavy series. They are made following the DIN 3015 standards. More so, they can be referred to as pipe clamps, tube clamps, PVC clamps, or pipe brackets. Also, stauff clamps are produced in different sizes and dimensions to suit other hydraulic systems' needs. |
Accessories Element |
|
Body Element & Temperature Dimension |
|
Size & Series |
|
Accessories Material |
|
1. What is a Stauff Clamps made of?
|
A stauff clamp or tube clamp is used in gripping hoses, tubes, or pipes together during installation. While holding these components together, a stauff clamp also ensures the components remain stable in their position without any movement, which may disrupt the installation process. They are made following the Deutsches Institut fϋr Normung standards, DIN 3015.
The clamp body is made with some materials that combine working to ensure this tool's primary purpose is achieved. The materials are Aluminum, Polypropylene, and Polyamide. These materials have different features and can withstand heat on different levels. For polypropylene, the working temperature ranges between -30 ⁰C to +90 ⁰C. Also, aluminium's working temperature level has a maximum of 300 ⁰C, while polyamide can work between -40 ⁰C to +120 ⁰C temperature level. The metal component used in the manufacturing of the Stauff clamp is Stainless Steel (SS316) and carbon steel. |
The table below summarizes this material and their temperature ranges:
Material Colour |
Material Code |
Temperature Range |
Body Colour |
Polypropylene |
PP |
-30 ⁰C to +90 ⁰C |
Green |
Aluminium |
AL |
Max to 300 ⁰C |
Silver |
Polyamide |
PA |
-40 ⁰C to +120 ⁰C |
Black |
Material Grade |
Material Code |
Surface Area Finishing |
Carbon Steel ST37.4 |
W1 |
Untreated |
Carbon Steel ST37.4 |
W2 |
Phosphated |
Carbon Steel ST37.4 |
W3 |
Zinc/Nickel Plated |
Stainless Steel (A2) |
W4 |
1.4301/1.4305 (AISI 304/303) |
Stainless Steel (A4) |
W5 |
1.2201/1.4571 (AISI 316/316Ti) |
Carbon Steel ST37.4 |
W10 |
Weld plate phosphate, all other parts zinc/nickel coated |
Carbon Steel ST37.4 |
W11 |
Rail nut untreated, all other parts zinc/nickel coated |
2. How many types of clamps are there?
As stated earlier, stauff clamps are produced in three different types – Standard Series, Heavy Series, and Twin Series. Here’s a brief explanation of each type:
- Standard series
- Heavy Series
- Twin Series
3. What are the uses for Stauff Clamps?
|
The following are the uses of stauff pipe clamps:
|
4. How to you use Pipe Clamps?
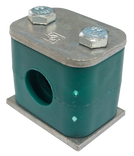
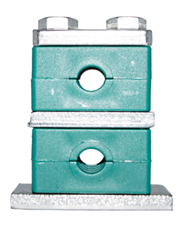
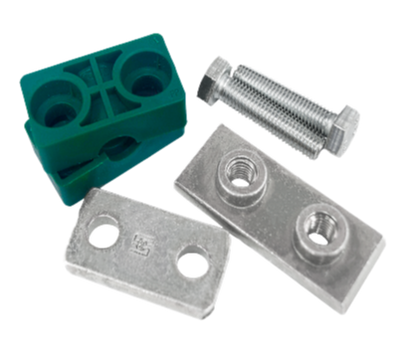
Stauff clamps can be assembled in several ways depending on the project it's being set up for. For example, the base plate can be connected to a top plate with the use of a hexagon bolt. With this method, the clamp body stays in the middle, and the clamp works most effectively for the purpose intended. However, other methods can be used if the configuration setting is different from the above-explained method. For height increase, rail nuts can be used. Also, rail nuts coupled with safety locking plates can be used to stack two clamps on each other.
Part Numbers |
Configuration |
SP-PP-DP-AS |
Single Weld Plate, polypropylene clamp, cover plate, 2 hexagon head bolts |
SPV-PP-DP-AS |
Elongated weld plate, polypropylene clamp, cover plate, and 2 hexagon head bolts |
SP-PP-IS |
Single weld plate, polypropylene clamp, 2 allan cap screws |
SPV-PP-IS |
Elongated weld plate, polypropylene clamp, 2 allan cap screws |
SM-PP-IS |
2 Hexagon rail nut, polypropylene clamp, allan cap screws |
PP-DP-AS |
Polypropylene clamp, cover plate, 2 hexagon head bolts |
SM-PP-DP-AS |
2 Hexagon rail nut, polypropylene clamp, cover plate, 2 hexagon head bolts |
PP-SIG-AF |
Polypropylene clamp, 2 allan cap screws |
PP-IS |
Polypropylene clamp, 2 allan cap screws |
The table above shows the possible components that can be combined for customized installation.
5. What is the installation process for Stauff Clamps?
|
Stauff clamps can be easily installed simply by fixing the clamp on a stable surface and fixing the clamp on either the hose, pipe or clamp tightly. This has to be done tightly from the beginning to avoid any shift during the work. Also, after work, the clamp can be disassembled easily. Moreover, the Stauff clamps have been designed in such a way that it can be installed and effectively work in an area with little space. Also, there are diverse weld base plate types produced in line with the DIN 3015 standards to allow installation of different customizable special clamps design.
When using stauff clamps, base plate installations have been the most used application. The purpose of the base plate is to mount the wall or ceiling, thereafter, the clamps are inserted and tightening with a cover plate, screws and bolts continue. For tightening, two thread types are used – metric thread and unc thread. |
Please follow the following steps:
STEP 1
Position the base plate in the desired location. Also, ensure the coming system loads can work effectively in these locations.
STEP 2
Place a sign for easy alignment at the position of the base plate.
STEP 3
Weld/Screw the base plate or elongated base plate to their positions. The extended base plate can be screwed without welding.
STEP 4
Release one-half of the stauff clamps to the bottom on the base plate.
STEP 5
You can now insert the hoses, tubes, pipe, or any other material to use.
STEP 6
Position the second half of the clamp with the cover plate on top of the tube or line used and complete the installation process with bolts and screws for tightening.
STAUFF CLAMPS catalogue


