
|
|
Anti-bloc fett / grease are used as seals for pipe end installations. They are applicable in a variety of industries and for machines such as hydraulic circuits and fluid conveyance systems. Anti-bloc fett, ABF are made from petrochemical hydrocarbon material and they provide metal to metal sealing for connections. Also, the complete set of the anti-bloc fett, ABF comes with an inclusion of WALRing and WALForm and also comprises two edge cutting rings. The major purpose of Anti-bloc fett, ABF is to ensure a reduced coefficient of friction between components during operation. |
Function |
|
1. What are Anti-bloc Fett / Grease, ABF?
Anti-bloc Fett / Grease
|
Sealants are beneficial when connecting flanges, pipes, tubes, or hoses. They are used to fill up the gap where leakages may occur during operation.
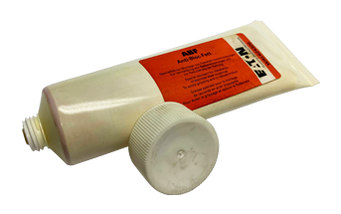
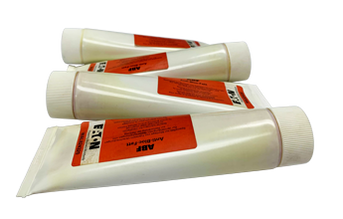
Anti-bloc fett (ABF) is a type of grease used on components, especially those made with stainless steel SS316 to reduce the friction that may occur during operation. They are used for metal to metal connections and ensure a tight connection is sealed to lock any form of leakage. They are available in various pack sizes as may be preferred by the user. Anti-bloc Grease fett (ABF) is available in different pack sizes. The can is packaged in 1000g and a smaller size which is the tube is available in a size of 100g. Also, when working with an installation requiring between 110⁰C to 400⁰C, the ABF-HT anti-blocking grease is recommended for use. Further, this grease is not suitable for application on drinking water equipment. |
2. How are Anti-bloc Fett / Grease applied in installations?
Anti-bloc grease is very simple to apply on installations to enhance the connection's sealing level, especially when they are metal-to-metal connections. Please refer to the steps below for a guide on how to add the grease to tubes or other components:
STEP 1: Measure the Tube Length
The first step when setting up an installation is to measure the tube length to the desired size. The tube length must fit other component sizes to ensure the perfect fitting. You can determine the tube length by
However, you have to put it in mind that materials have different tube length determinants such as Stainless steel and steel (1.4571). Therefore, you have to be sure about the length before any other procedure.
STEP 2: Cut the tube at the right spot
Some tubes get damaged on the road to delivery and this could affect the installation during operation. Therefore, it is advisable to cut the tube 10mm away from the cut-off point. Cut the tube at a ½” angle from the tube axis. When cutting the tubes, you have to use the right equipment. Pipe cutters or cut-off saws are the wrong cutting tools to use as the cut will be burr or diagonal which isn’t good for the installation.
STEP 3: Clean the Tube
You may notice some particles at the end of the tube. You have to clean the tube's inner and outer parts (max. 0.2 x 45⁰) to ensure it is free from particles, dirt, or paint. Then, the clamping area of the tube must also be free from oil or grease. You can clean the oil off with any mild solvent.
STEP 4: Coat all ends with the Anti-bloc Grease, ABF
After cleaning off all dirt and grease, apply the grease on all the tubes' contact sides. You can use a lint-free cloth or brush to apply the grease. After applying the grease, couple the components together immediately to ensure the ends are free from any contaminants that could reduce the effectiveness of the grease. The Anti-bloc grease (ABF) should be used alongside Walterscheid stainless steel nuts and silver-plated threads for the best sealing results.
STEP 1: Measure the Tube Length
The first step when setting up an installation is to measure the tube length to the desired size. The tube length must fit other component sizes to ensure the perfect fitting. You can determine the tube length by
- Measuring the space between the tube stops of two studs. The length measured will be added to the length size of the tube connection.
- Measuring the gap between the face ends of two studs. Also, the length measurement will be added to the already known length of the tube connection.
However, you have to put it in mind that materials have different tube length determinants such as Stainless steel and steel (1.4571). Therefore, you have to be sure about the length before any other procedure.
STEP 2: Cut the tube at the right spot
Some tubes get damaged on the road to delivery and this could affect the installation during operation. Therefore, it is advisable to cut the tube 10mm away from the cut-off point. Cut the tube at a ½” angle from the tube axis. When cutting the tubes, you have to use the right equipment. Pipe cutters or cut-off saws are the wrong cutting tools to use as the cut will be burr or diagonal which isn’t good for the installation.
STEP 3: Clean the Tube
You may notice some particles at the end of the tube. You have to clean the tube's inner and outer parts (max. 0.2 x 45⁰) to ensure it is free from particles, dirt, or paint. Then, the clamping area of the tube must also be free from oil or grease. You can clean the oil off with any mild solvent.
STEP 4: Coat all ends with the Anti-bloc Grease, ABF
After cleaning off all dirt and grease, apply the grease on all the tubes' contact sides. You can use a lint-free cloth or brush to apply the grease. After applying the grease, couple the components together immediately to ensure the ends are free from any contaminants that could reduce the effectiveness of the grease. The Anti-bloc grease (ABF) should be used alongside Walterscheid stainless steel nuts and silver-plated threads for the best sealing results.
3. What are the applications of Anti-bloc Fett / Grease?

Anti Bloc Fett / Grease
|
The lubricant can be applied in the following areas:
|
The table below shows the differences between installation with and without Anti-block fett / grease:
Assembly without Anti-bloc Grease/Fett (ABF) |
Assembly with Anti-bloc Grease (ABF) |
|
|
|
|
|
|
|
|
4. What is the tightening torque value for the tubes?
Please refer to the table below for the tightening torque value for steel and stainless steel materials:
|
|
5. What are the assembly instructions for Taper-seal fittings?
Please refer to the guide below for the perfect guide on how to assemble taper-seal fittings:
STEP 1
Grease the ring of the fitting. Place the tube connection in the right position and hand tighten the union nut.
STEP 2
Tighten the union nut by a 1/3 turn past the point of resistance. When using fittings made of steel, use a torque wrench to tighten the nut. Any error in the torque tightening may result in leakage of process fluids.
For stainless steel fittings, check the threads and thoroughly clean dirt or any contaminants away. Also, check the body for any damage or scratches that could affect the assembly. Lubricate the threads generously using the Anti-bloc Fett (ABF) and assemble the fittings immediately to avoid contamination.
The tables below show the tightening torque for taper-seal fittings:
|
|
6. What is the assembly process for Standpipe Fittings?
|
Please refer to the instructions below for the assembly of Standpipe fittings:
The complete set of standpipe fittings includes a pre-assembled profile ring. Before installation, keeps the fittings stud in place using a wrench. When there’s an error in fitting sizes or other unpleasant conditions, install the fittings using a vice.
|
Anti-bloc Fett / Grease
|
anti bloc fett / grease catalogue
Let's get together
|
|

Anti Bloc Fett / Grease
|


